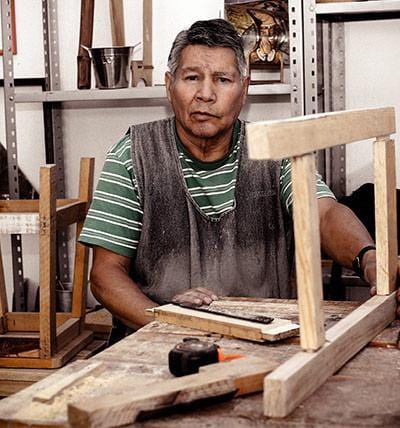
There are a few essentials for anyone starting out or with years of experience in creating photo frames. With right tools for frames, you may create frames that are not only sturdy, but also visually appealing.
A Measuring Tape
You need a decent tape measure if you want to construct picture frames or if you want to choose a suitable present. There are many other kinds, but this article will focus on only two of the most common.
The roll-up, self-retracting kind is very common. The tape is protected from bending by a metal blade. Having this in place guarantees precise measurements.
A second type is a tape measure that serves two purposes. The blades of these types are marked with both numbers and a running inch increment. When gauging the dimensions of internal walls, this function might prove handy. The tool may also be used to sketch approximate circles.
High-quality materials are used in the production of the best tape measures. You can fold them up and put them away easily. There is a belt clip available with some of them.
Create a Triangular Draft
Constructing picture frames with the use of a drafting triangle may be done more quickly while still producing professional-looking results. If you want to make sure your frame is square before you start gluing, this is a great method.
The drawing triangle has a lot of subtlety for a tool of its type. A slow, deliberate stroke is recommended for optimal outcomes. Placing the drafting trilgide on the blade's mitered end is the most effective usage of the tool. Clamping the trilgide to the frame is another option; before gluing, make sure everything is square.
One other item that would be appreciated by the picture frame enthusiast in your life is a drawing triangle. They feature a substantial gripping surface and are available in a range of sizes. There is a 100% satisfaction guarantee or your money back.
Hand-Held Sanding Device
Whether you're a weekend warrior with a passion for home improvement or a full-time carpenter, a portable sander may be a lifesaver. Tools like these may be used to smooth and shine a variety of materials, including wood, plaster, and paint.
A finish can be stripped using them as well. Take grit size into account while shopping for a sander. When sanding wood, it's best to start with a rougher grit and work your way up to a finer grain to finish.
Pneumatic sanders are the most rapid option. This sanding equipment is driven by compressed air. They shine at tasks requiring significant force. A compressor can be required for their use.
An orbital finishing sander for standard household use shouldn't cost more than $75. Compared to a palm sander, their power is limited, but they excel at sanding vast areas quickly and efficiently. As a bonus, they're an excellent option for those just starting out. They are low-noise, small, and simple to operate.
Angular Clamps
A corner clamp is an essential tool for anybody who creates art, takes photos, or constructs their own picture frames. Most miter junctions are created with corner clamps. You can put your frame together quickly and easily using these.
Many sizes and designs of corner clamps are on the market. Clamps may be fabricated from a variety of materials, including plastic, metal, and wood. Choose one that is designed to function with the material you intend to use it on. A clamp with moveable jaws might also come in handy.
Some clamps have a handle for easier use. This is significant since it might facilitate your work in a more natural and relaxed manner. It's crucial that you test the handle quality and make sure it's pleasant to grasp.
Parallel Saw
While constructing picture frames, it is critical to use an appropriate miter saw. With the proper saw, you can cut lumber to exact specifications for your 3D frame.
Then, find out the dimensions of the photo frame you intend to use. After that, you'll need to cut down the size of your wooden components to make them work. This can be done manually, or with the assistance of a professional framer.
Likewise, there are examples available online that you may use. The procedure is simplified because of them. After you're done, use nails or screws to secure the picture frame.
The miter saw may be a lifesaver when building picture frames, but there are a few precautions you should take beforehand. You should pick a saw that is both well-equipped and well-made. Understanding how to properly set up a miter saw and secure materials is also essential.
Plexiglass
Plexiglass is a versatile material that may be used to showcase any number of photographs, from formal family portraits to your all-time favorite childhood snapshot. In addition to being lightweight and durable, this material also boasts superior optical clarity. Moreover, it is recyclable and long-lasting, making it an excellent material for framing artwork.
Acrylic is a strong and protective substance that is also quite lightweight. Certain varieties of the material provide UV protection, which will keep your photographs looking fresh for a lot longer than they would without it.
As it weighs very little, carrying it is a breeze. In addition to its strength, acrylic is also shatterproof, making it less prone to crack when dropped.


